Headers And Footers
Take a look at any page; be it a book, magazine
or newspaper and you will see that all the way
around the edge of the page is a gap of half and
inch or an inch. The ones on the left and right are
known as the left and right margins respectively,
but those at the top and bottom are different. These
are known as headers and footers. The header, as you
can imagine, is at the top of the page and the
footer is at the bottom.
When creating a professional document these two
areas are very important. They are important because
you can actually insert text into them. The text can
be something as simple as a strap line, chapter
number or page number. You can even choose exactly
where you intend to place these items. For example,
you could put your strap line or chapter number in
the header and page number in the footer. Adding
headers and footers gives clarity to your documents and gives them that all
important professional look.
Checking your options
The header and footer options are accessed via
the View button on the main Microsoft Word toolbar.
First click View then, from the drop down menu, click Header and Footer.
On clicking the Header and Footer option you will
notice that a toolbar appears and the header and
footer area on each page is bordered by a dotted
line. (See Fig 1).
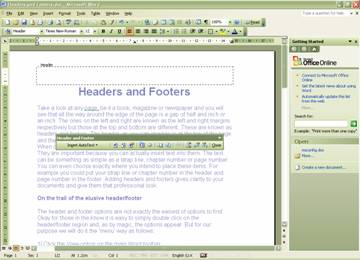
Fig: 1 Header area and Toolbar
Your number’s up
Adding page numbers to the header is one click
away. From the Header and Footer toolbar (See Fig 2)
click the first button to the right of the Insert
Auto text button. This will then place the page
number in the left hand corner of the header region.
Alternatively you could simply press the Insert Auto
text button and select the PAGE option. Choosing
this option, however, places the page number central
to the header. Should you not want the page number
on the left of the page simply place the cursor in
front of the page number and then, from the main
Microsoft Word toolbar click on the Centre or Right
align button. The page number will then align
according to your instructions.

Fig: 2 Header and Footer Toolbar
The header and footer toolbar contains numerous
options to enable you to create a really
professionally looking document. As well as
inserting a single page number by clicking the
relevant button you can also insert the number of
pages in the document and format the way the page
numbers will appear, i.e., 1,2,3; a,b,c; or i, ii,
iii.
Ahead of the game
If you place your cursor inside the dotted area
of the header you will find that you will be able to
also type in text. The same applies to the footer
area too. If you are planning on using the page
numbering facility outlined above, it is best if you
insert and align the page number first before
entering text into the header/footer zone.
So to begin we will type ‘Header and Footer
Tutorial’ into the header area of the page. The
result should look like Fig 3 below. If you take a
look at every page in your document you will now see
that the header you have just typed appears on each
and every page.
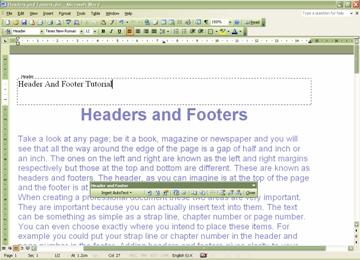
Fig: 3 Text added to the Header
area
By selecting the header text you can format it
using the normal word font types and sizes and embellish it
using the Bold, Underline, and Italic options on the
main Microsoft Word toolbar. Should the document
need to contain a date and time stamp you can add
this from the Insert Date and Insert Time buttons on
the header and footer toolbar. Just like text in a
normal document you can also select whether the text
is left aligned, right aligned or aligned centrally.
Auto Text
By clicking the Insert Auto Text button (see Fig
4) you can add extra information to the header
and/or footer regions. These include:
- PAGE
- Author, page, date
- Confidential, page, date
- Created by
- Created on
- Filename
- Filename and path
- Last printed
- Last saved by
- Pages x of y

Fig: 4 Insert Auto Text menu
In Fig 5, below, you can see that the author,
page and date option from the Insert Auto Text menu
has been chosen.
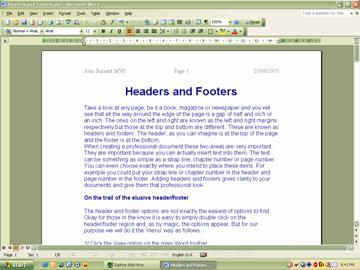
Fig: 5 Author, Page and Date
added to header
Odds on favourite
Depending upon the document in question it may be
necessary to create different header and footer for
odd and even pages. This is easily accomplished by
clicking the Page Setup button on the header and
footer toolbar. Once the Page Setup window opens,
click the Layout tab. In the section marked Headers
and Footers you will see two options.
- Different odd and even.
- Different first page.
Left click your mouse in the relevant option box
to perform the task you want to do.
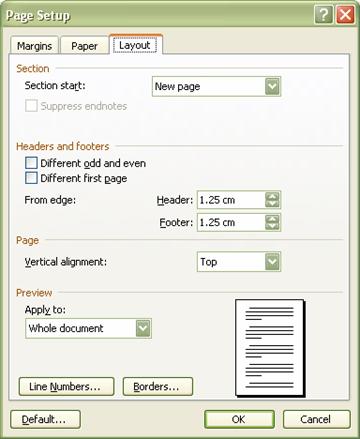
Fig: 6 Page Setup Window
The first page of any professional document
usually does not contain either a header/footer or
page number. By selecting the Different first page
option from the Page Set up window you can delete
the header/footer and page number text. When your
document is printed the first page will have no
header/footer text or page number while the
following pages will contain both header/footer text
and page numbers.
Give it a try and make all your documents look
both professional and impressive!