Guide To Microsoft Word Art
There are more ways of enhancing Microsoft Word documents than simply making the
text bold, italic or underlined. Making an impact is
the keyword when creating any document, whether it
be a simple letter or a more complex publication.
WordArt can help you achieve that impact with the
minimum of fuss and effort. So take this guided tour
of WordArt and see how quickly your document
creation improves.
By Design
To start working with WordArt open a new word
document and then click the Drawing icon on the main
toolbar. The first thing you notice is that a
new toolbar set has appeared at the
bottom of the Word document window. This toolbar has
a host of interesting icons, but the one we are most
interested in is the one marked ‘A’. (Fig 1)

Fig: 1 The Drawing Toolbar
Click on the 'A' icon now and the following
WordArt Gallery window will appear. (Fig 2).
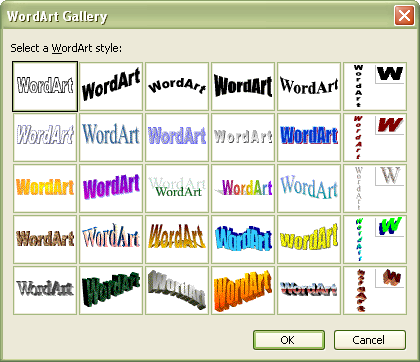
Fig: 2 The WordArt Gallery
Text Options to Die For
You will notice that you have rather a large
choice of WordArt options. Double click on any one
of the options and a new Edit Text window will appear (Fig 3).
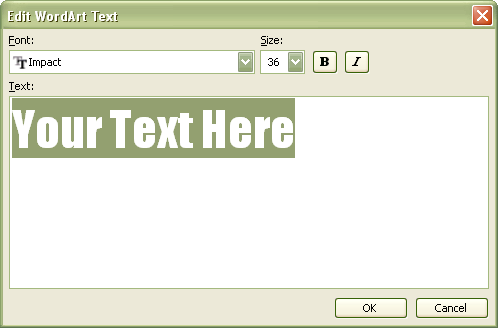
Fig: 3 Edit WordArt Text window
Type the text you want to add to your document in
the text dialogue box. As you can see you can add
embellishments like Bold or Italic simply by
clicking the relevant button at the top of the
window. At the same time you can also make changes
to the Font type and size by clicking the relevant
font and/or size selection arrows.
Creative Masterpiece
After typing in your text and making any
adjustment for font type and/or size simply click
the OK button and the text you typed into the
WordArt text dialogue box will instantly be inserted
into your Microsoft Word document. (Fig 4).

Fig: 4 The finished WordArt
It really is that simple. So now there is no
excuse not to liven up your word documents and make
then stand out from the crowd. And if you are not
satisfied with having horizontal text, why not
change it to vertical (Fig 5).

Fig: 5 Vertically Lined Text
There really is no excuse for boring run of the
mill documents. WordArt will spruce things up and
give that boring text document a new lease of life.