Watermarks are added to documents for a
variety of reasons. We are all familiar with the
document which has been designated Top Secret or
Confidential. Watermarking, however, doesn’t
stop at marking a document ‘for your eyes only.’
A watermark can also be added to give your
document individuality and, as you will see, is
not restricted to simply adding text to the
page.
A Picture Paints A Thousand Words
Giving a page a watermark adds character to
your document presentation. But why restrict
yourself to words when it is just as easy to add
a picture or company logo to every single page
of your document.
A watermark is simply a layer of text or
graphics which is printed in a lighter colour
and is laid down prior to being over-printed
with your normal text.
Designed To Impress
Microsoft Word 2003 makes adding a watermark
a piece of cake. The hardest part is deciding
whether you prefer a graphic design, such as a
company logo or photograph, or whether you
simply want to mark each sheet with a text
banner.
Start As You Mean To Go On
The quickest way to add a watermark is to
start with the document open in normal view.
From here you proceed as follows:
1/ From the main word document toolbar click
the Format option.
2/ From the drop down menu click
Background followed by Printed
Watermark.
3/ The Printed
Watermark dialogue box will now open
(see fig: 1).
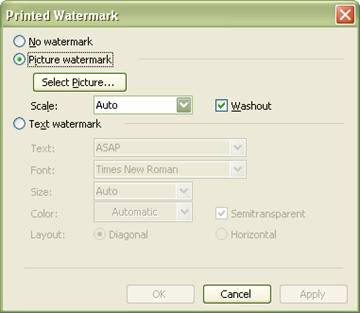
Fig: 1 Printed Watermark
Window
4/ If you want to use a picture or logo as
your watermark select the Picture Watermark
option and then click the Select Picture
button. If you want to use clipart instead of a
picture open the clipart in word prior to
creating the watermark, then copy the clipart
and paste it into Microsoft Paint. After the clipart has
been pasted into Microsoft Paint, or some other
image editor, you should save the
clipart as a JPEG, Giff or
Tiff to the My Pictures
folder.
5/ Browse to the picture file you want to add
to your document and click OK.
6/ The selected picture will now be added to
your document.
7/ You can either scale the picture yourself,
via the scale drop down list
(see fig: 2), or else set the scale to
Auto to allow word to automatically fir
the picture to the page.
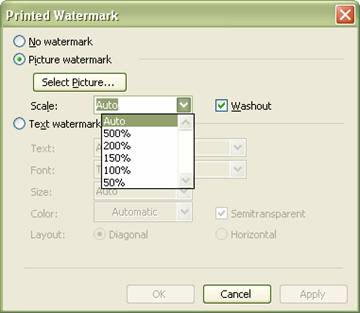
Fig: 2 Scaling the selected
picture
8/ The Washout option is set
by default to ensure that the graphic is
[printed in a lighter tone than any accompanying
text.
9/ Once you have finished click the
OK button to add the picture to your
page. (see fig 3).

Fig: 3 Picture Watermark
A Word To The Wise
Graphics obviously make the watermark stand
out on a page. But there are times when a
picture isn’t needed and standard text will do
the job just as well. To add a text watermark
proceed as follows:
1/ Click the Format option
on the main toolbar.
2/ Click Background followed
by printed watermark.
3/ In the Printed watermark dialogue box
select Text watermark (see fig:
4).
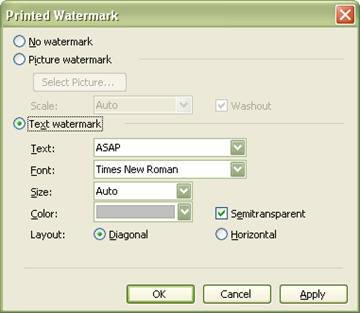
Fig: 4 Text Watermark
Selection
4/ From the text drop down box select the
appropriate text for your document, i.e.,
ASAP, Confidential,
Top Secret, etc, or type your
own text comment in the box and then
select the Font you want the
text printed in along with the colour of the
text.
5/ Text can be displayed either
diagonally or horizontally,
so choose which direction you want the text to
run.
6/ Once again the semi transparent
option is selected by default to ensure that the
watermark text is lighter in colour than the
main body text.
7/ Finally click OK to have
your text watermark added to each individual
page. (see Fig 5).

Fig: 5 Text Watermark
Disappearing Act
By default word adds the watermark to the
header of every single page in your document. If
you don’t want the watermark to appear on
certain pages, simply select the page(s) that
you do not want the watermark to appear on and
delete it the watermark from that section.
If, after viewing the document, you decide
you no longer want a watermark just click the No
watermark option at the top of the Printed
watermark Windows and the watermark will
disappear.